Panel: Presets
The Presets Panel is where chart presets are managed.
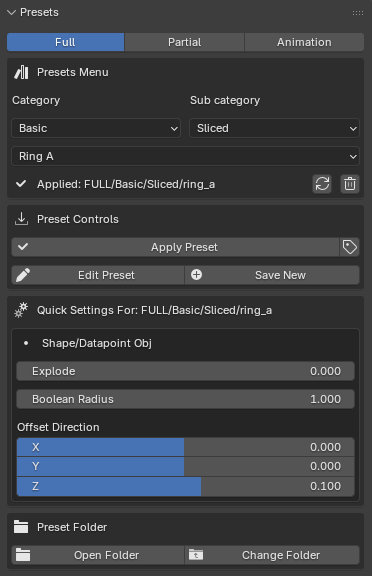
The Presets Panel in use.
Components: Installation
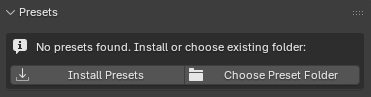
Presets not installed or directory not found.
Components: General
List: Preset Type

The Preset Type List.
Select the preset type. Only the selected preset type will be shown in category and preset dropdown lists. The options are:
Full
Full presets contain properties and socket values for all chart components.
Partial
Presets that contain only selected properties and socket values or tags.
Animation
Presets that contain keframed properties or socket values..
Components: Preset Menu Box
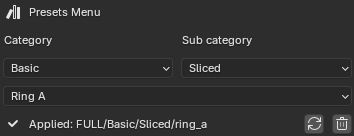
The Presets Menu box.
Allows selection and management of installed presets. The dropdown lists are filtered based on the selection of List: Preset Type.
List: Category
Select the preset category. This selection will update List: Sub category.
List: Sub category
Select the preset sub category. This selection will update List: Selected Preset.
List: Selected Preset
Select a preset to apply/edit/delete.
Label: Applied Preset
Shows current applied preset info (Full presets only).
Components: Preset Controls
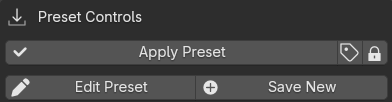
The Presets Controls box.
Button: Apply Preset
Applies the selected preset to the chart.
Updates Label: Applied Preset.
Full Presets:
Applies all compatible properties and socket values to chart components.
Partial Presets:
Applies only saved tags, or solo properties to chart components..
Animation Presets:
Creates NLA tracks based on tags saved in the preset file. Open NLA Editor to edit applied animations.

Animation Utilities box.
Once an animation is successfully applied, additional options become available.
Toggle: Apply Tags
Reveals the Apply Preset Tags box. Select or deselect tags to Apply. Tags will be applied from the preset selected in List: Selected Preset.
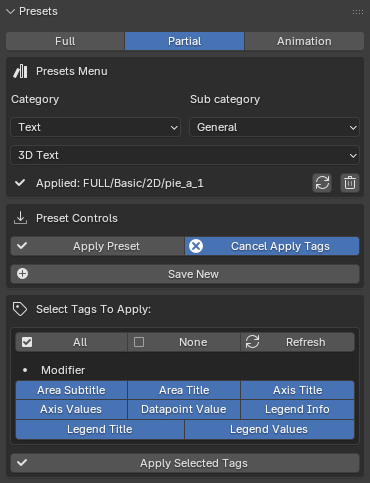
The Preset Apply Tags box.
Tip
The selection in List: Selected Preset may be changed while the Apply Tags toggle is active. In order to apply partial tags from different presets.
For Partial and Animation presets only tags that are saved in the preset file will be initially shown. Full presets show all tags by default.
Toggle: Edit Preset
Reveals the Preset Edit box. Only for full preset types.
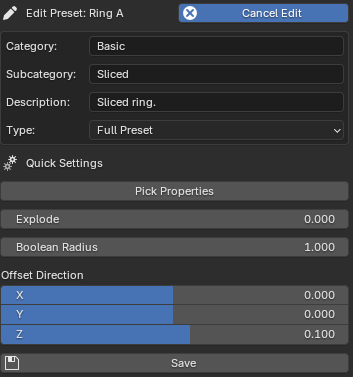
The Full Preset Edit box.
Toggle: Cancel Edit
Closes the Edit box.
String: Category (Edit Mode)
Shows the current category. The preset sub category will be saved in this category. Folders will be created in the installed presets location if modified.
String: Subcategory (Edit Mode)
Shows the current sub category. The preset file will be saved in this sub category. Folders will be created in the installed presets location if modified.
String: Description (Edit Mode)
Type a description for the preset. This will appear as a tooltip when hovering on the preset in List: Selected Preset.
List: Type (Edit Mode)
Select preset type to be saved. Will default to Full Preset, leave as is unless it is desired to save a full preset as a partial preset.
Toggle: Pick Properties (Edit Mode)
When Enabled, allows picking of quick settings. A Checkbox will be created next to compatible properties and input sockets in the Chart Setup panel. After saving the selection will appear as quick settings when applying the preset.
Toggle: Save New
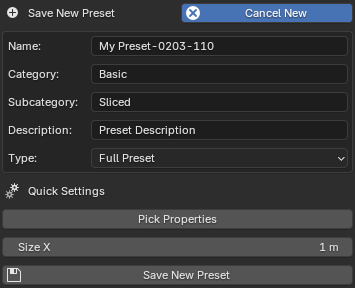
Reveals the Save New Preset box. The image below shows the different modes of save new preset depending on preset type.
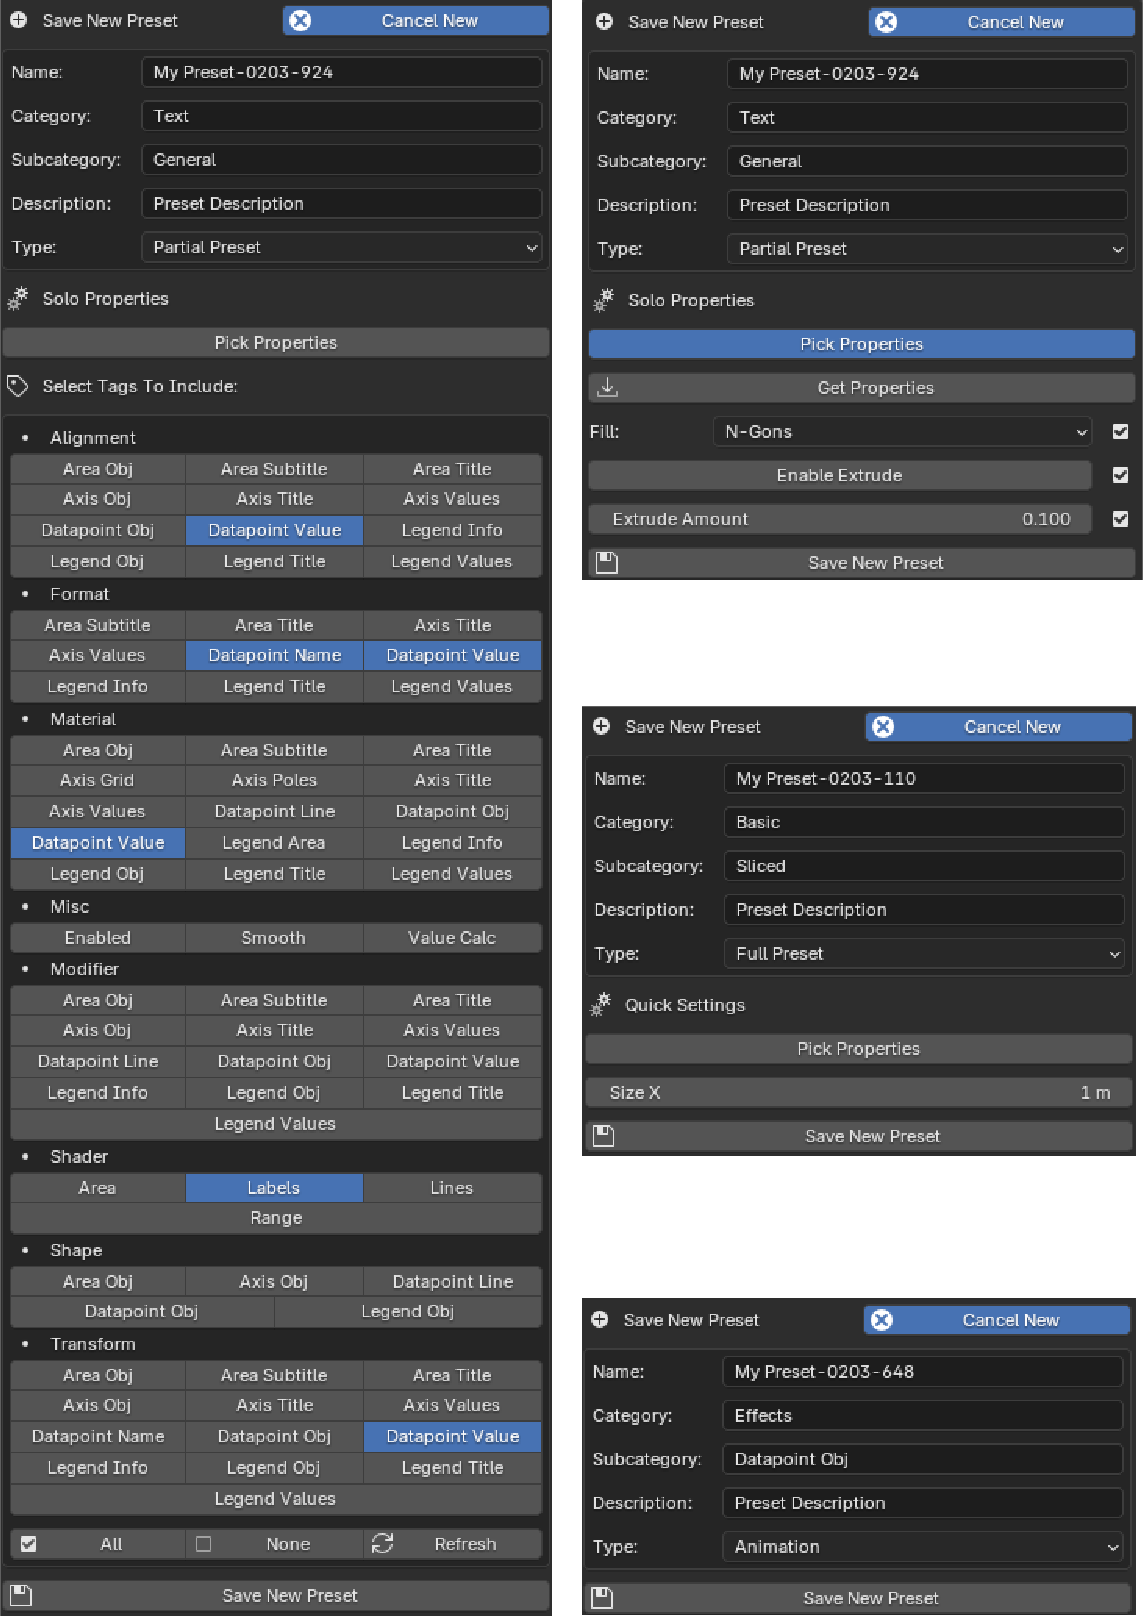
New Preset box for Full, Partial (By Properties), Partial (By Tags), and Animation presets.
Toggle: Cancel New
Closes the Save New Preset box.
String: Name
Type a name for the preset. A date stamped with random suffix will be generated automatically, change as desired.
String: Category
Type a category. The preset sub category will be saved in this category. Folders will be created in the installed presets location if needed.
String: Subcategory
Type a sub category. The preset file will be saved in this sub category. Folders will be created in the installed presets location if needed.
String: Description
Type a description for the preset. This will appear as a tooltip when hovering on the preset in List: Selected Preset.
List: Type
Select preset type to be saved. Will default to List: Preset Type_ selection, leave as is unless it is desired to save a full preset as a partial preset.
Toggle: Pick Properties
Full Presets:
When Enabled, allows picking of quick settings. A Checkbox will be created next to compatible properties and input sockets in the Chart Setup panel. After saving the selection will appear as quick settings when applying the preset.
Partial Presets:
When Enabled, allows picking solo properties to save. The partial preset will only save properties selected. When Disabled, partial presets use the tagging system instead.
Components: Quick Settings
For full presets only. Display properties and socket inputs defined with Toggle: Pick Properties. Differs from preset to preset.
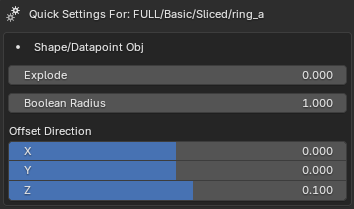
Preset Quick Settings.
Components: Preset Folder

Presets folder box.
Usage Examples
Install Presets
On first load, the Presets Panel will display as below. Install presets to access the full panel functionality.
Presets not installed or directory not found.
Click Button: Install Presets.
Select a folder that will contain the ChArtist presets folder.
Note
Once presets are installed it will load automatically when Blender starts.
Video: ChArtist Preset Installation
Change the presets folder
Click Button: Change Folder if presets are already installed.
Click Button: Choose Preset Folder if no current presets are installed.
Select a folder containing presets.

Selecting a presets folder location.
Note
ChArtist preset system requires the chosen directory to contain folders named “Full”, “Partial”, and “Animation”.
Do not select any of the sub folders, simply open the parent directory and select Change Preset Folder.
The image above illustrates this process where the example path is:
X:\Chartist Demo\Your Custom Preset Folder\
Apply a Preset
Select Preset
Choose a preset type: List: Preset Type.
Choose a preset category: List: Category, and sub category List: Sub category.
Choose a preset: List: Selected Preset.
Apply Preset
Video: Apply Full Presets and use Quick Settings
Option A: Apply Complete preset.
Click: Button: Apply Preset.
Option B: Apply selected tags only.
Toggle: Toggle: Apply Tags.
Select desired tags to apply.
Click: Button: Apply Selected Tags.
Save a new Preset
What and how presets save depend on the preset type.
Save a new Full Preset
Adjust Values as needed in Setup Panel.
Select Full Preset in List: Preset Type.
Navigate to existing preset category: List: Category, and sub category List: Sub category. or skip this step.
Press Toggle: Save New.
Type a name in String: Name.
Type a new or existing preset category: List: Category, and sub category List: Sub category.
Optional: Pick Properties.
Select Toggle: Pick Properties.
Selecting custom properties to include in chart quick settings.
From the Chart Setup Panel, choose properties to include as quick settings.
Click Button: Save Preset.
Save a new Partial Preset
Adjust Values as needed in Setup Panel.
Select Partial Preset in List: Preset Type.
Navigate to existing preset category: List: Category, and sub category List: Sub category. or skip this step.
Press Toggle: Save New.

Type a name in String: Name.
Type a new or existing preset category: List: Category, and sub category List: Sub category.
Option A: Pick Properties
Select Toggle: Pick Properties.
Selecting properties to save to partial preset.
Optional: Click Button: Get Properties.
From the Chart Setup Panel, choose properties to save.
Option B: Pick Tags
Deselect Toggle: Pick Properties.
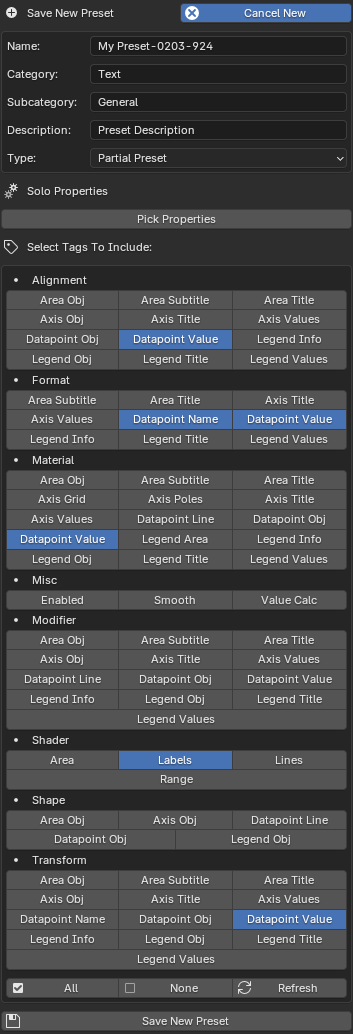
Selecting tags to save to partial preset.
From the Tags to Include box, select tags to save.
Click Button: Save Preset.
Save a new Animation Preset
Note
Animation presets work best when paired with existing full presets.
This is not always the case, many values will work with all combination of components.
Select or create a full preset (optional, see note above).
Create keyframes on compatible properties and input sockets in the Chart Setup Panel. Also set frame interpolation if required.
Note
Adding just one keyframe on a value will work and save to the animation preset. However, its recommended to at least add two keyframes and create boundary keyframes at the first and last frame of the animation in the dope sheet.
Select Animation Preset in List: Preset Type.
Navigate to existing preset category: List: Category, and sub category List: Sub category. or skip this step.
Press Toggle: Save New.
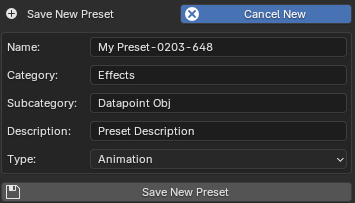
Type a name in String: Name.
Type a new or existing preset category: List: Category, and sub category List: Sub category.
Click Button: Save Preset.
Change the default preset
Note
When Initially mapping data Chartist will load the default preset.
ChArtist will always load the first preset in the list, this is why the category and preset name are 00_Default. Creating categories or presets within this category that precede 00_Default - Like “000_AAA” - might cause errors.
Important
This will permanently change the default preset, to get the original default back presets need to be re installed.
Apply the preset:
Full/00_Default/00_Default/00_Default
In List: Category, List: Sub category and List: Selected Preset select the preset that should replace the default preset.
Click Toggle: Apply Tags.
Select all tags and Click Button: Apply Selected Tags.
Click Toggle: Apply Tags (Cancel Apply Tags) to Close Tag box.
In List: Category, List: Sub category and List: Selected Preset select the default preset as in the first step, but don’t apply it.
Click Toggle: Edit Preset.
Click Button: Save (Edit Mode).
The default preset is now updated permanently.